


前言
通常我们可以使用Ngrok、nps、frp等一些开源工具实现内网穿透,ngrok和frp主要是没有web页面配置,nps的好处是多了个Web页面,所以我们这里介绍一下使用nps配置内网穿透。
前提条件
- 一台有公网IP的服务器
- 公网IP
- 域名
VPS购买
推荐:https://app.cloudcone.com/?ref=8403 ,国外的VPS,还可以做点其他东西,支持支付宝,送一个公网IPv4
免费域名申请
推荐:http://www.freenom.com/en/index.html
配置服务端
下载NPS服务端:https://github.com/ehang-io/nps/releases
- 可以在github下载后传到服务器,也可以直接在服务器使用wget命令下载
wget https://github.com/ehang-io/nps/releases/download/v0.26.10/linux_amd64_server.tar.gz
- 下载好后解压出来
tar -zxvf linux_amd64_server.tar.gz - 进入到解压好的文件夹中,使用
sudo ./nps install安装即可,默认安装路径是/etc/nps - 安装完成后,使用
sudo nps start就可以启动了
配置文件
appname = nps
#Boot mode(dev|pro)
runmode = pro # 运行模式,默认是dev

#HTTP(S) proxy port, no startup if empty
http_proxy_ip=0.0.0.0 # 代理地址使用默认即可
http_proxy_port=80
https_proxy_port=443
https_just_proxy=false # 代理https默认是true,为了使用https改为true
#default https certificate setting
https_default_cert_file=/etc/nps/conf/cert/cert.pem
https_default_key_file=/etc/nps/conf/cert/key.pem

##bridge
bridge_type=tcp
bridge_port=8024
bridge_ip=0.0.0.0

# Public password, which clients can use to connect to the server
# After the connection, the server will be able to open relevant ports and parse related domain names according to its own configuration file.
public_vkey=***

#Traffic data persistence interval(minute)
#Ignorance means no persistence
#flow_store_interval=1

# log level LevelEmergency->0  LevelAlert->1 LevelCritical->2 LevelError->3 LevelWarning->4 LevelNotice->5 LevelInformational->6 LevelDebug->7
log_level=7
#log_path=nps.log

#Whether to restrict IP access, true or false or ignore
#ip_limit=true

#p2p
#p2p_ip=127.0.0.1
#p2p_port=6000

#web
web_host=
web_username=xxx # 登陆web界面的用户名
web_password=**** # 登陆web界面的密码
web_port = 8080 # 登陆web界面的端口
web_ip=0.0.0.0 # 登陆web界面的IP
web_base_url=
web_open_ssl=true # 登陆web界面开启https,默认是false
web_cert_file=/etc/nps/conf/cert/cert.pem
web_key_file=/etc/nps/conf/cert/key.pem
# if web under proxy use sub path. like http://host/nps need this.
#web_base_url=/nps

#Web API unauthenticated IP address(the len of auth_crypt_key must be 16)
#Remove comments if needed
#auth_key=test
auth_crypt_key =1234567812345678

#allow_ports=9001-9009,10001,11000-12000

#Web management multi-user login
allow_user_login=false
allow_user_register=false
allow_user_change_username=false


#extension
allow_flow_limit=false
allow_rate_limit=false
allow_tunnel_num_limit=false
allow_local_proxy=false
allow_connection_num_limit=false
allow_multi_ip=false
system_info_display=false

#cache
http_cache=false
http_cache_length=100

#get origin ip
http_add_origin_header=false

#pprof debug options
#pprof_ip=0.0.0.0
#pprof_port=9999

#client disconnect timeout
disconnect_timeout=60
上述配置文件中根据自己的需求进行配置,这里我们默认使用了通配符域名证书,具体生成方式见 Mac下制作免费的域名通配符证书
配置好以后,使用命令nps restart重启一下服务即可。然后通过http://ip:8080就可以访问了。
Openwrt客户端
在openwrt客户端只需要安装对应的应用即可,涉及到的有npc.ipk、luci-app-npc.ipk等,安装的时候如果报错可根据日志查看缺少的依赖包,缺少哪个下载安装即可,详细的下载地址在这里:
https://op.supes.top/packages/
https://downloads.openwrt.org/snapshots/targets/x86/64/packages/
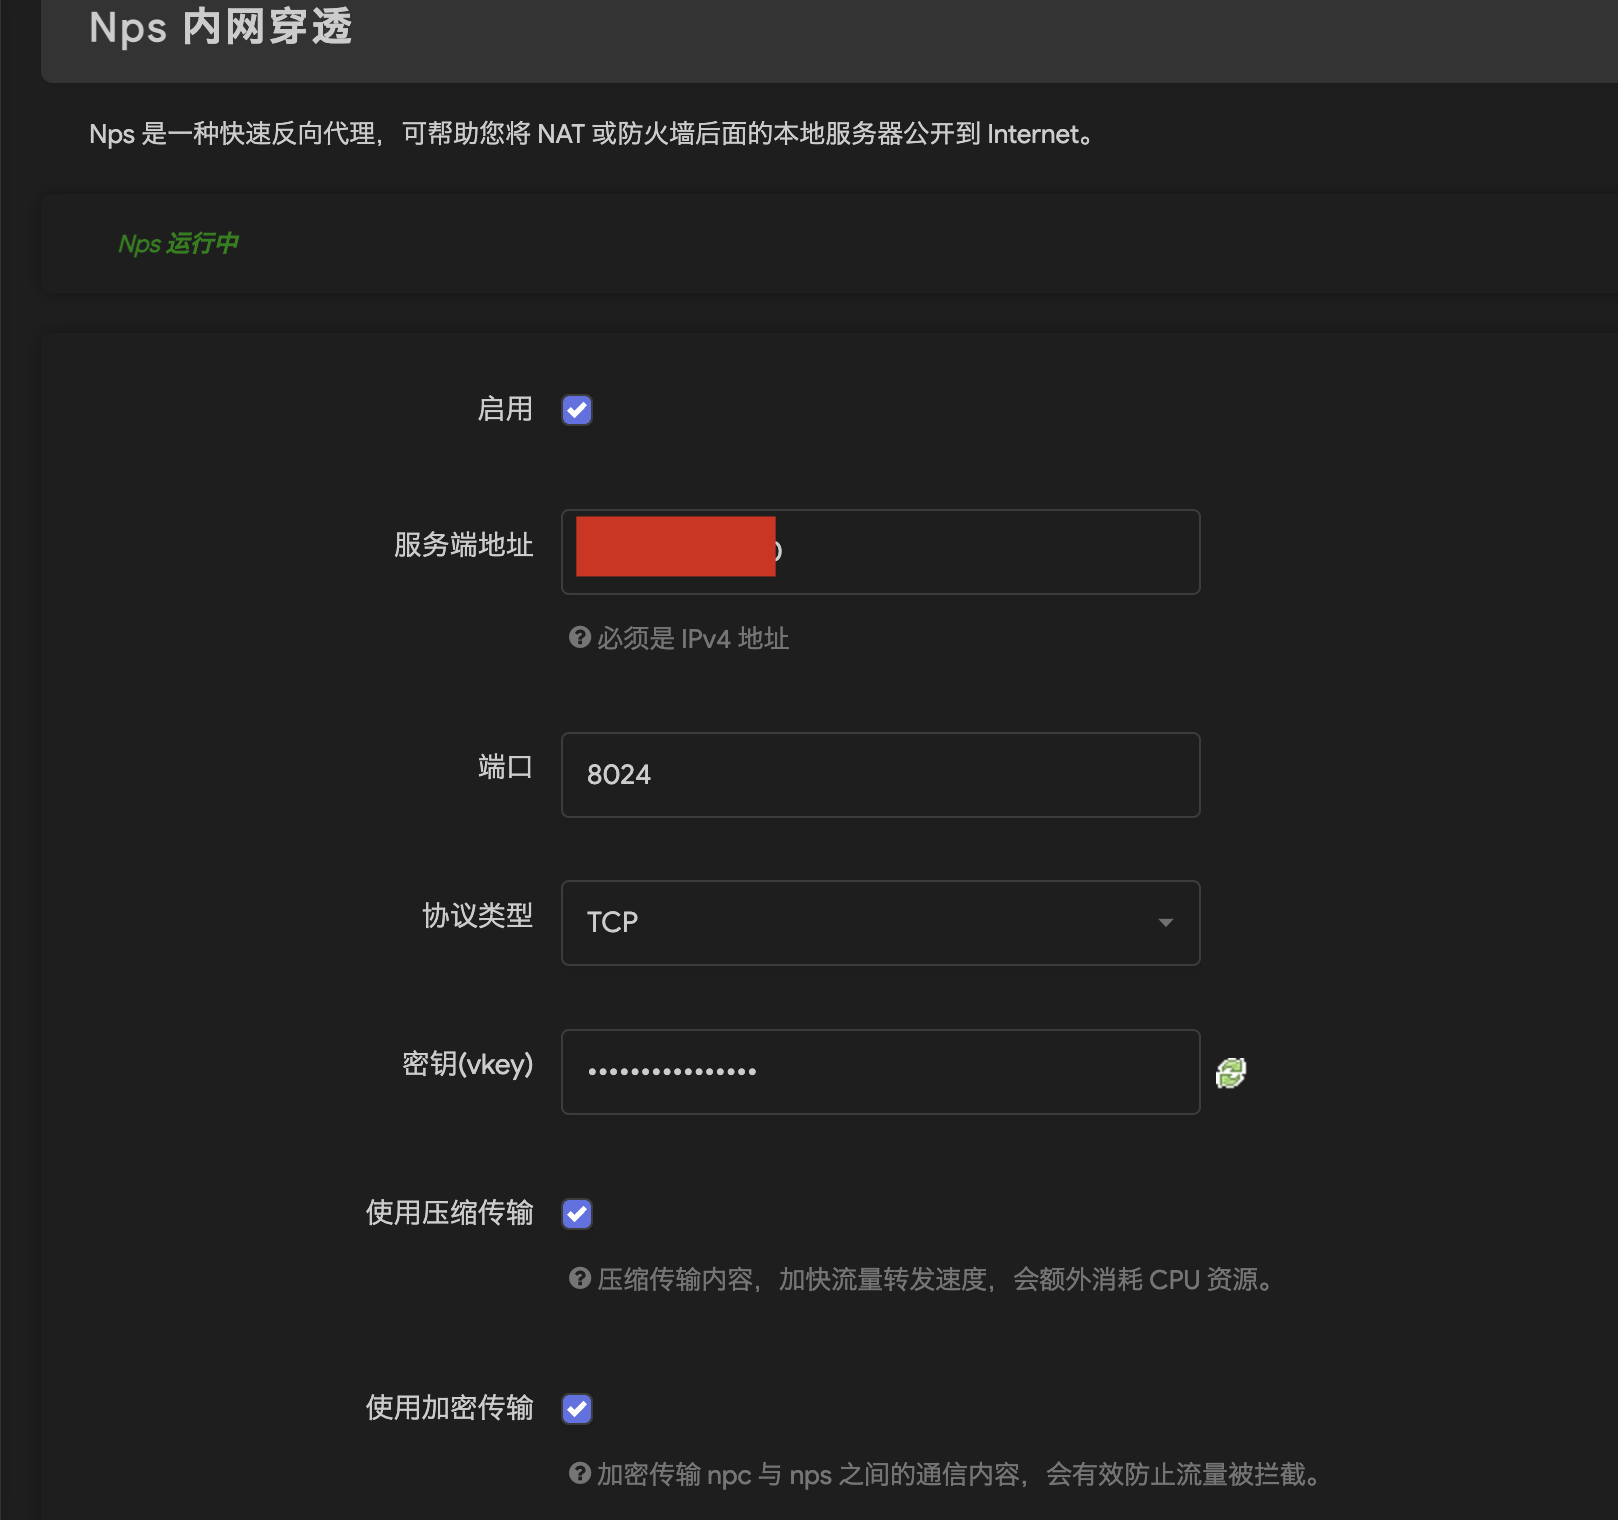
这里的服务端地址就是VPS的IP地址,端口默认,密钥需要我们在nps服务端添加。
服务端增加客户端配置
-
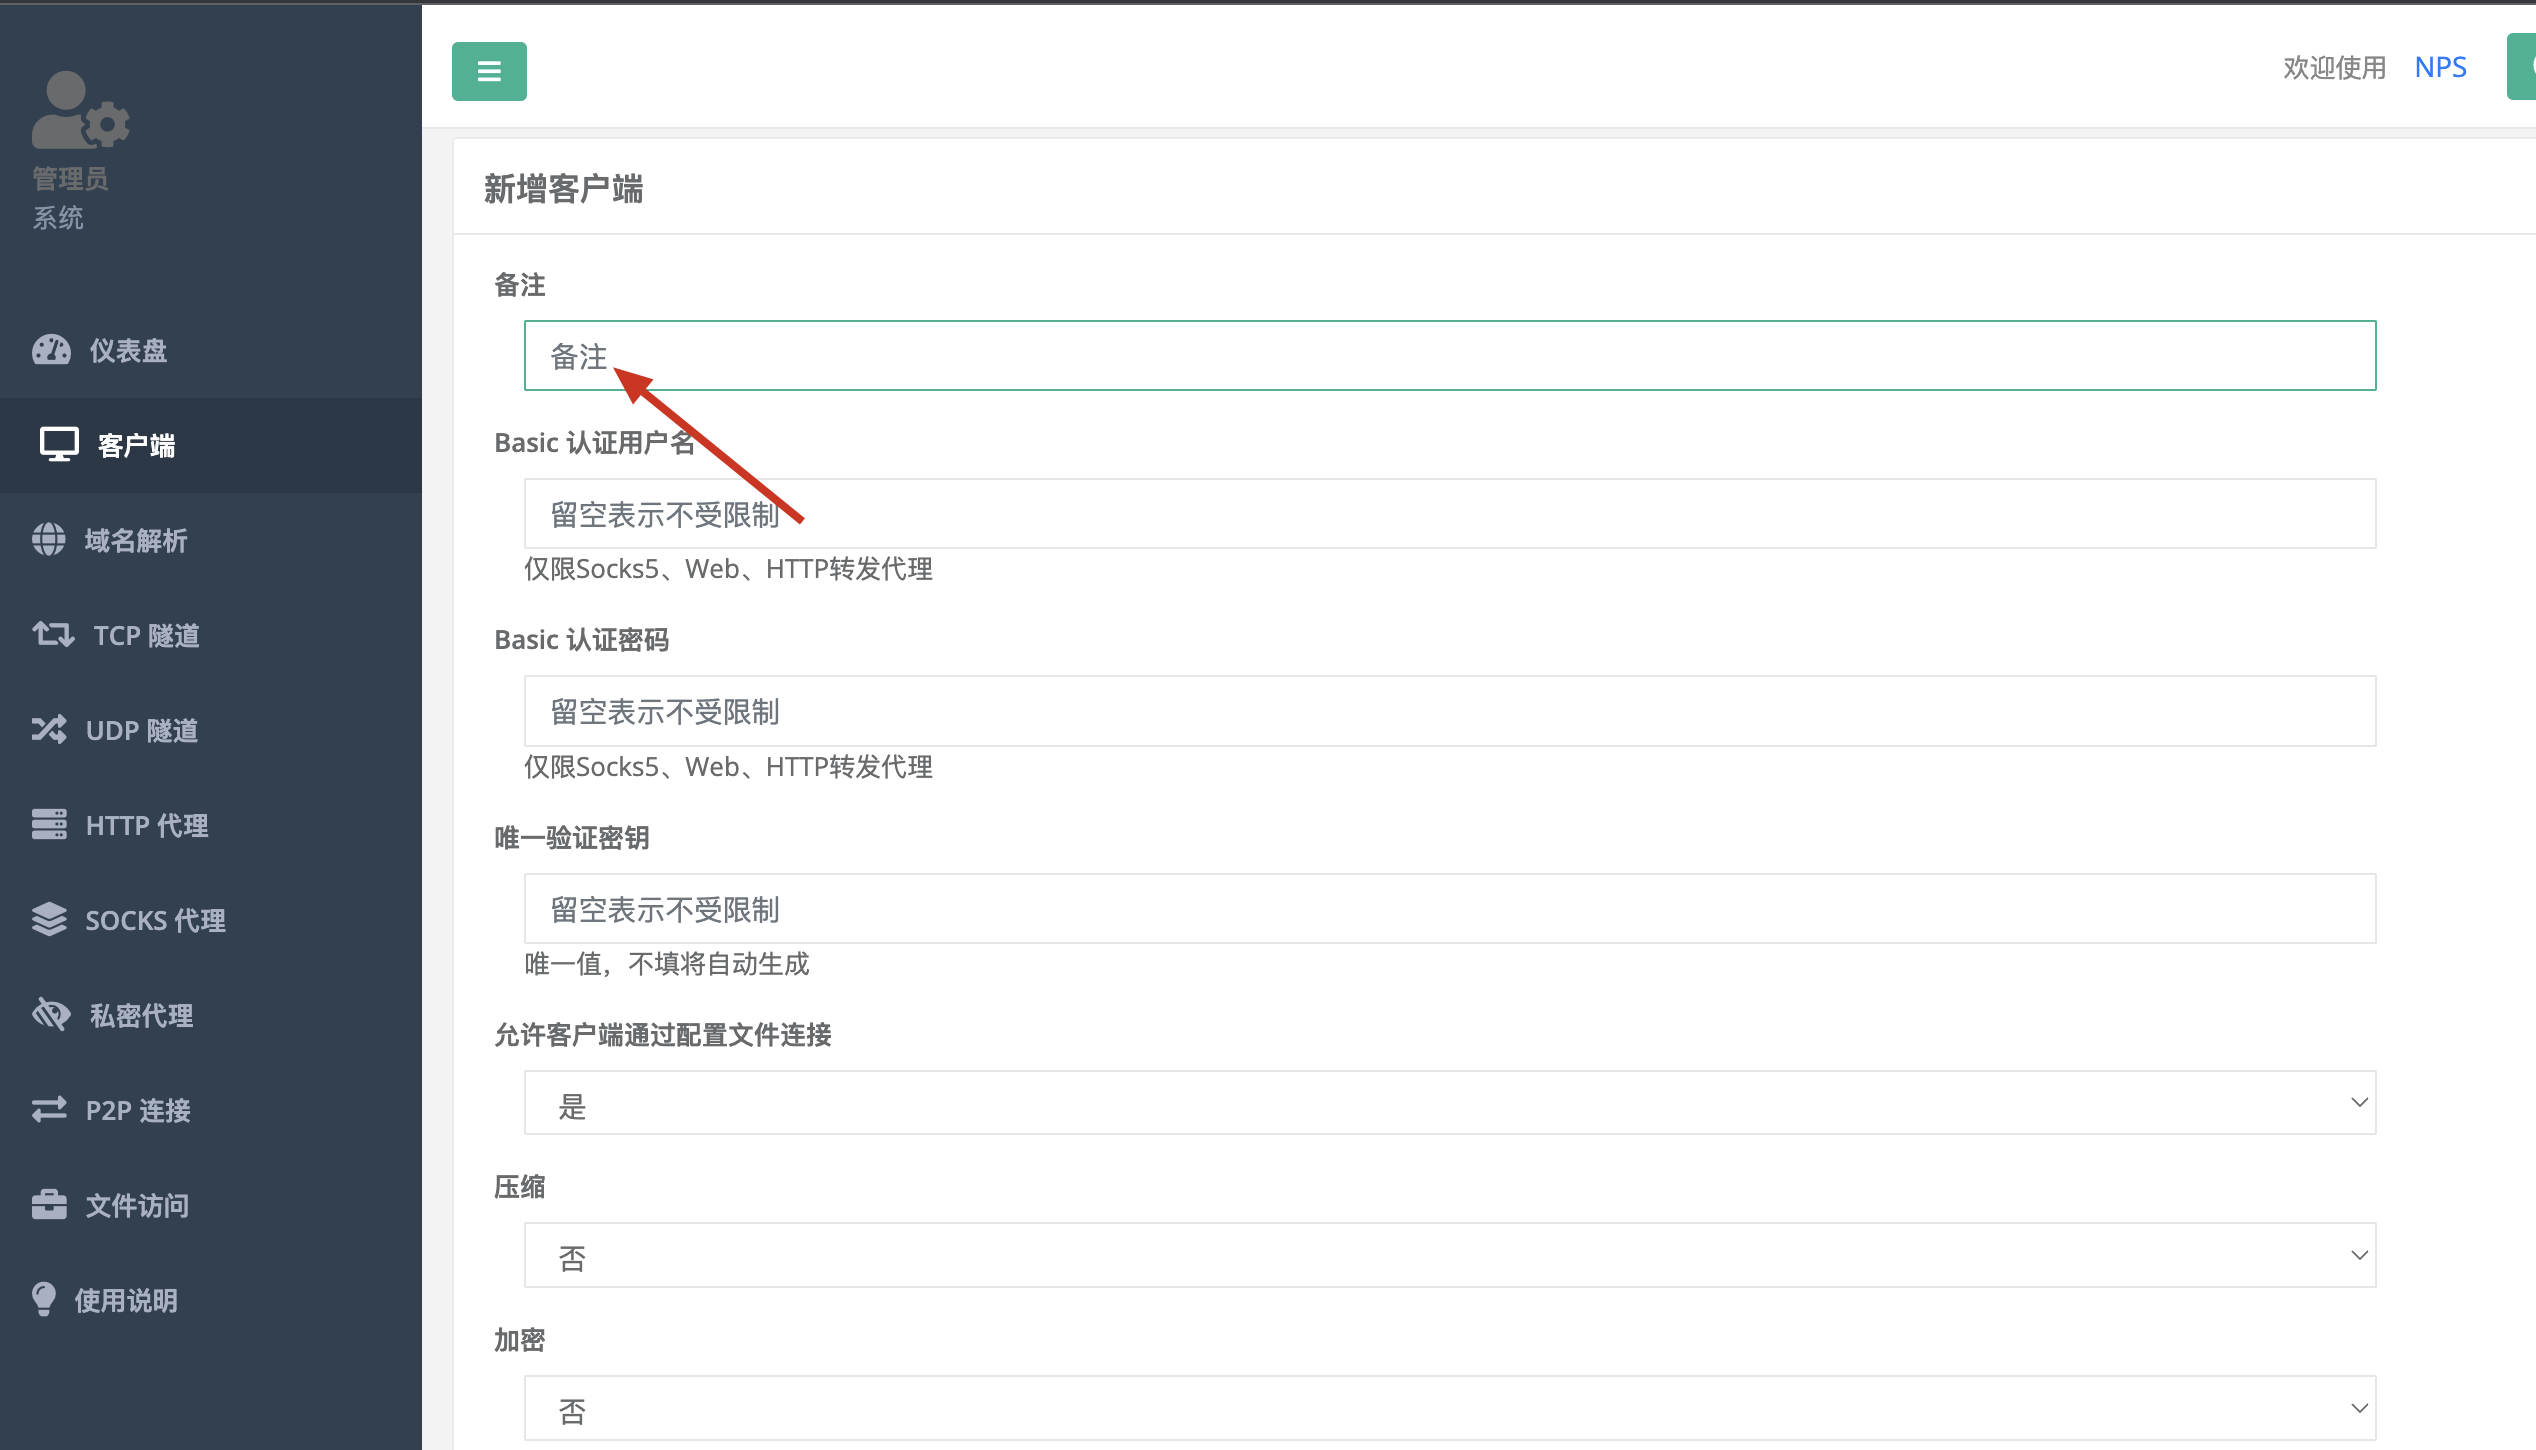
在管理页面新增一个客户端,填写备注,选择加密为是,其他可以保持默认
-
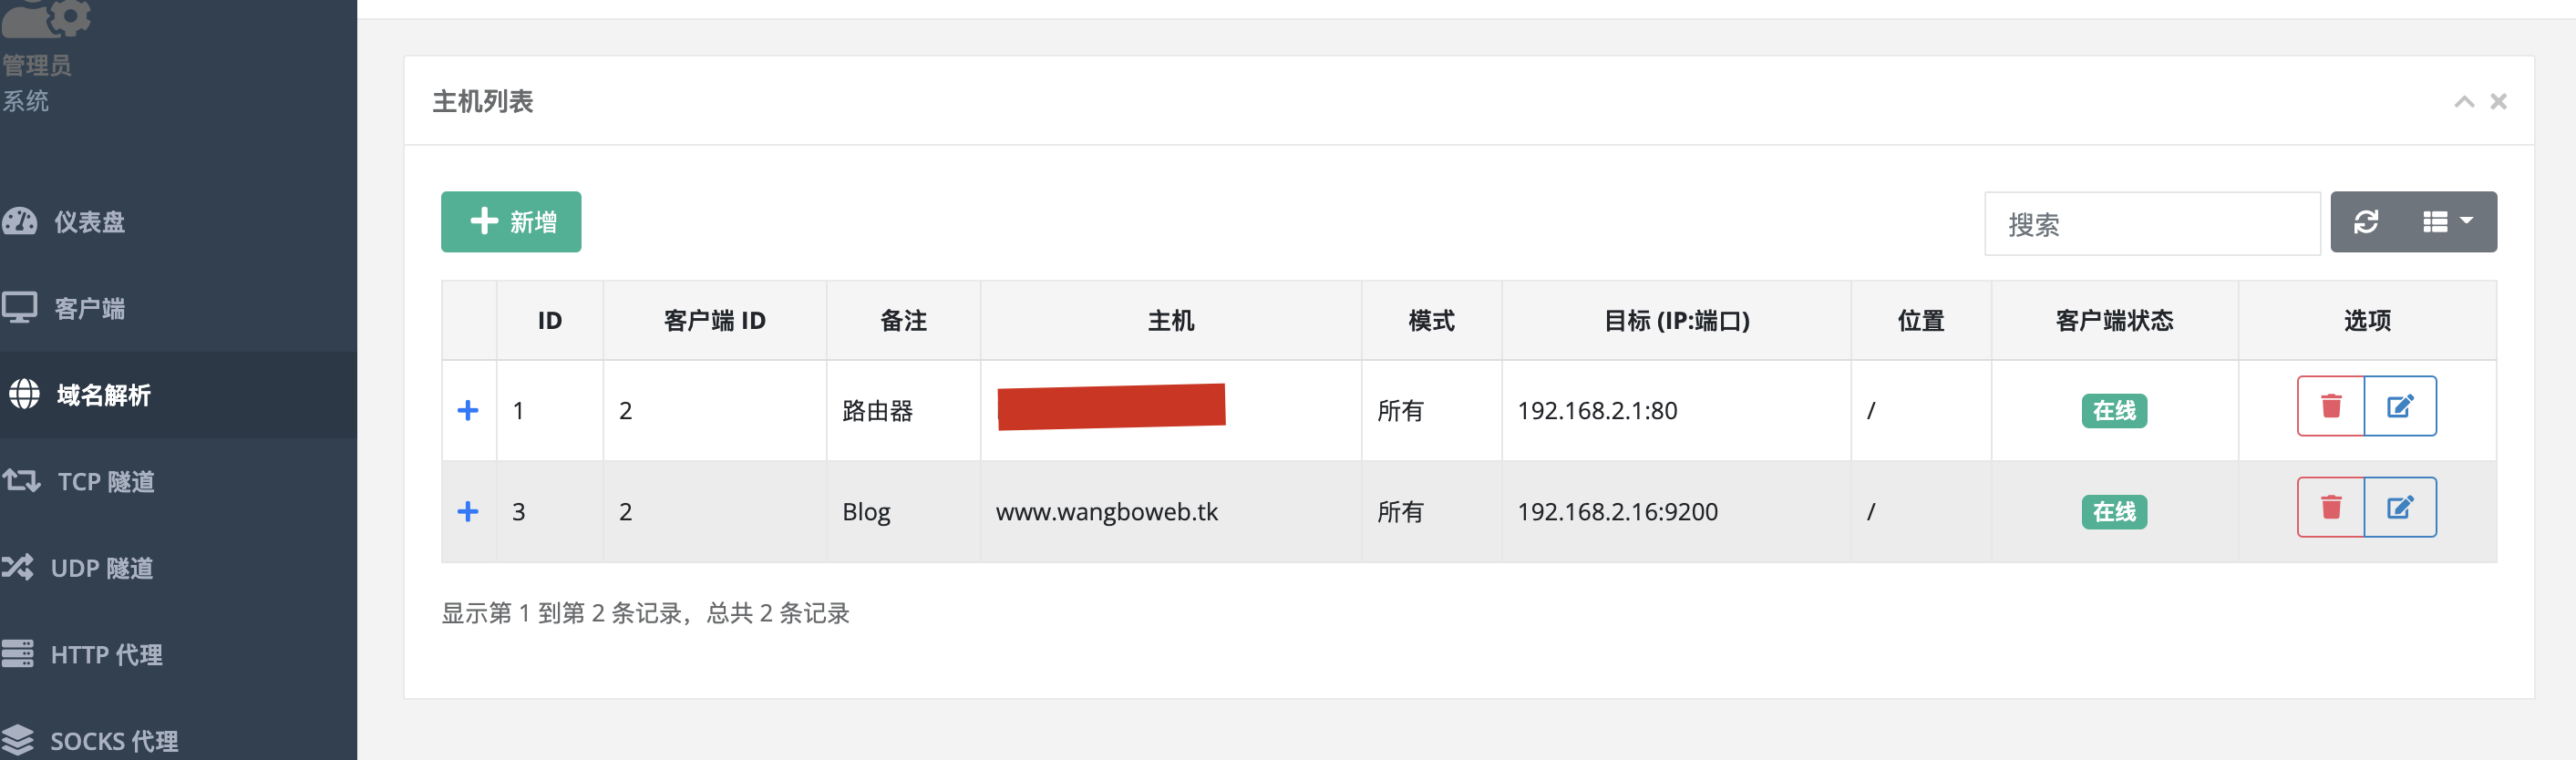
新增后会自动生成一个密钥,这个密钥就是上面路由器的nps客户端中需要填写的,以及会获取到客户端的IP地址

-
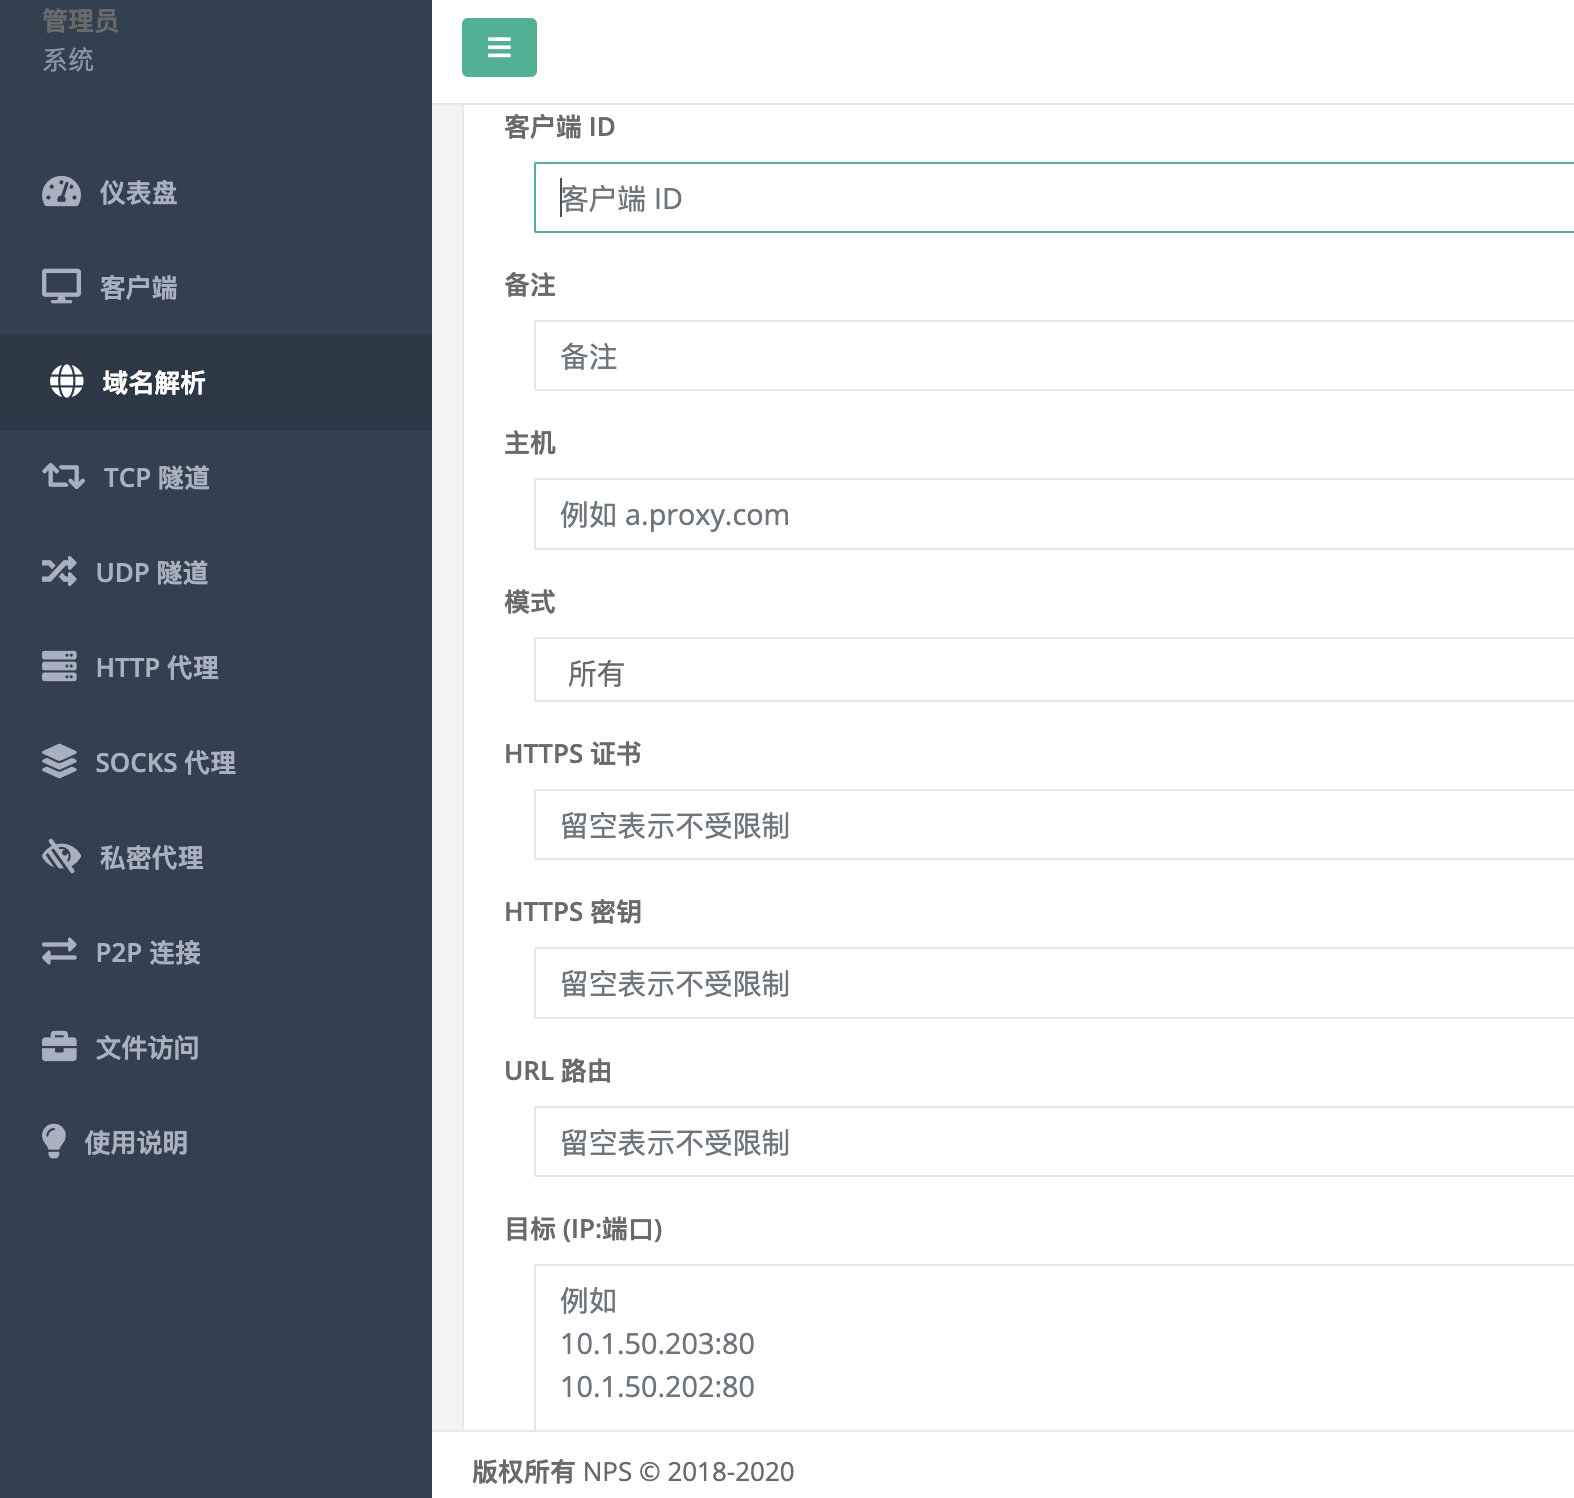
在域名解析中添加域名解析,客户端ID就是上一步中新建的那个客户端的id,备注自己随意,主机就填写自己要使用的域名,目标填写你内网的IP和端口
-
填写成功后,就实现了内网穿透了,就可以使用域名进行访问了
-
因为我们在配置nps服务端的时候已经配置了通配的域名证书,所以有关域名证书的地方都保持默认,nps会使用默认的域名证书实现https。
最后,可以访问 https://www.wangboweb.tk,其实就是访问到了我内网的192.168.2.16:9200的服务,即我的博客。


评论区